Waterford Early Learning: Creating and Assigning Tags for District Administrators
District administrators can create custom tags that can be used across the district to assign to students. Once the tags are created, they can be applied to students by teachers, school administrators, and other district administrators within your district.
Creating and Managing Custom Tags
To create new custom tags in your district:
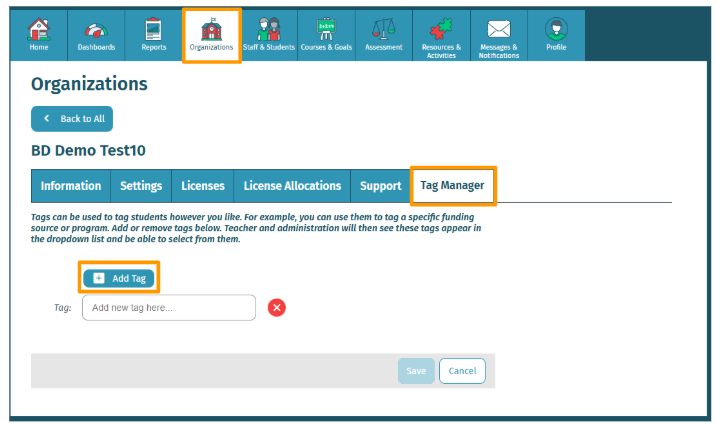
- Log in to your Waterford account and navigate to the Organizations tab.
- Select Tag Manager, then select the + Add Tag button. You will be redirected to a text bar.
- Enter the tags that you want to be available within your district. Please note that the accepted characters are:
- Alphanumeric
- Underscore
- Dashes
- Spaces (excluding leading and trailing)
- To add more tags, select the + Add Tags button. A new row where you can add your next tag will appear.
- Select Save once you have added all of your new custom tags.
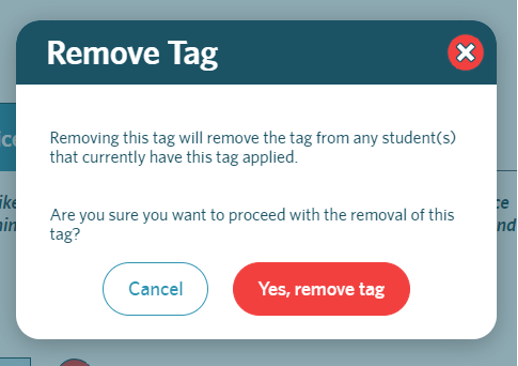
When your tags have been saved, they can be assigned to students within your district by all educators.
Assigning Tags to Students
Assigning custom tags to individual students or in bulk can be done by all educators across your district.
To assign a tag to an individual student:
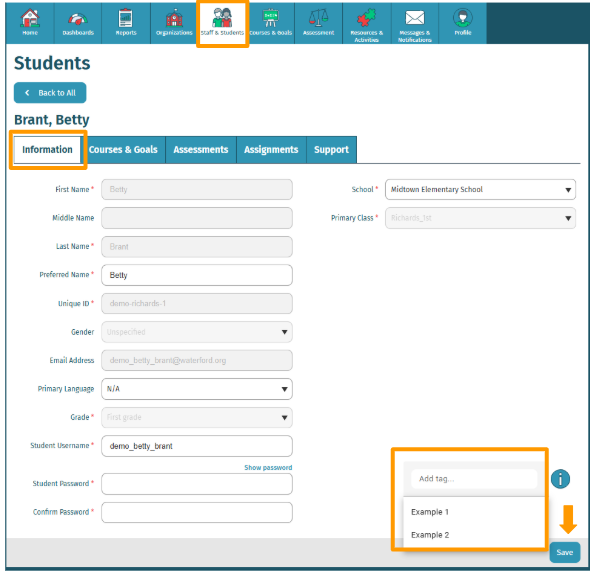
- Log in to your Waterford account and visit the Staff and Students tab.
- Select the drop-down bar for an individual student.
- In the bottom right-hand corner of the Information tab within Staff and Students, scroll to the Tags box.
- Press anywhere within this box to see a pre-populated list of tags available for this student.
- Choose the tags you would like to assign to this student, then select Save to confirm your choices.
Assigning Tags to Multiple Students
You can also assign a tag to multiple students. To assign tags for multiple students at once:
- Log in to your Waterford account and visit the Staff and Students tab.
- Apply School and Class filters as needed to navigate to the student(s) you would like to assign tag(s).
- Check the box next to the name(s) of all students whom you want to assign tag(s). You can view the number of students who meet your filter criteria and how many you have currently selected at the top of the list.
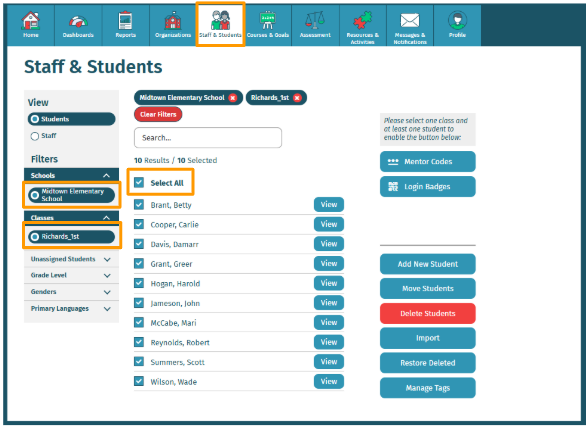
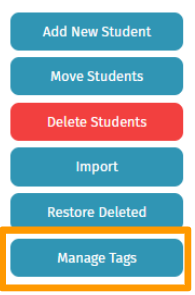
- Select the Manage Tags button to the right when you have chosen all the students whom you would like to assign the custom tag(s). You will be redirected to a pop-up window.
- Press anywhere in the pop-up window to select the tag(s) you want to assign to these students. After you have selected one or more tags, a + Add Tags button will appear.
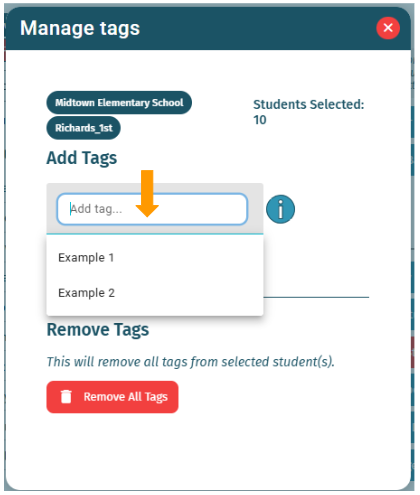
- Select the + Add Tags button, then select Confirm to finalize your choices.
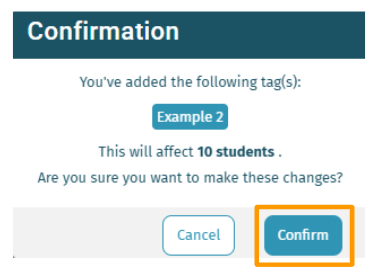
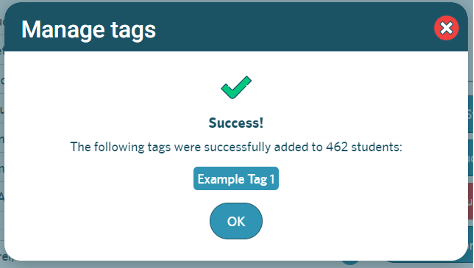
While your bulk tag assignment request is in progress, visit your notifications to see a progress bar with the operation status. When the operation is complete, you will receive a confirmation dialogue to let you know it was successful.

You will then be able to view student data by tag by using the Tags filter in the Dashboards and Reports tabs.
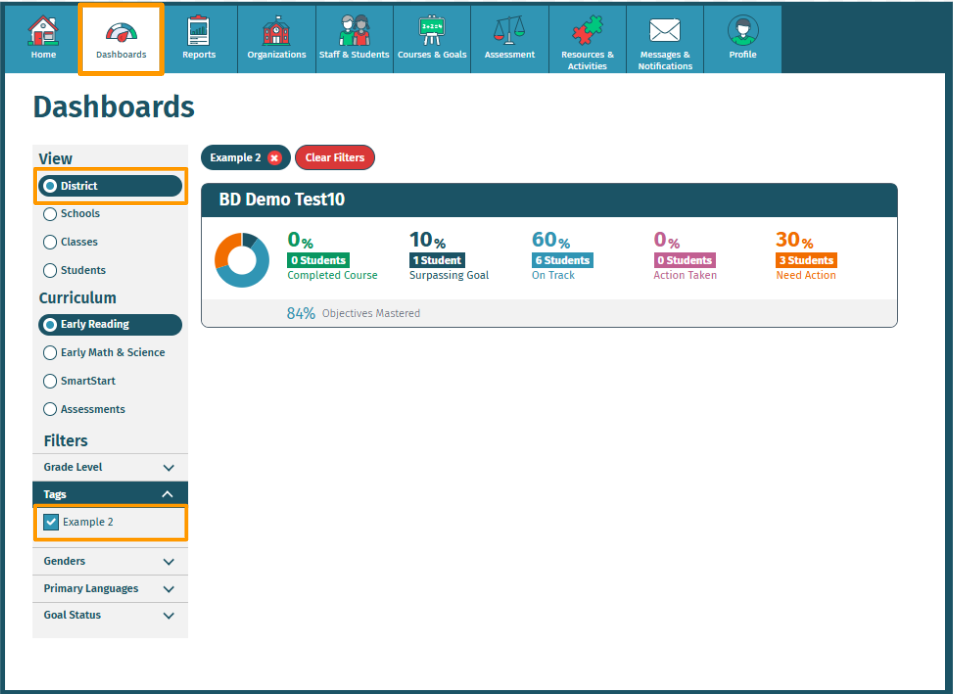
Applying Tags to Waterford Dashboards and Reports
After you have assigned custom tags to students, you will be able to view student data by tag by using the Tags filter in the Dashboards and Reports tabs. To apply tags as dashboard filters:
- Log in to your Waterford account and visit the Dashboards tab.
- Select the View (District, Schools, Classes, or Students) you want to see for this dashboard.
- Select the Tags filter on the left and apply the custom tag(s) you would like to use to sort your students.
To apply tags as report filters:
- Log in to your Waterford account and visit the Reports tab.
- Select the View (District, Schools, Classes, or Students) you want to see for this report.
- Select the Tags filter on the left and apply the custom tag(s) you would like to use to sort your students.
- Continue generating your selected report (visit this page for instructions).
Here’s a step-by-step walkthrough in video format.
Last Updated: 6/09/25